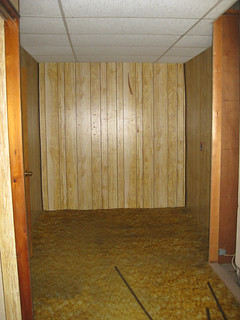
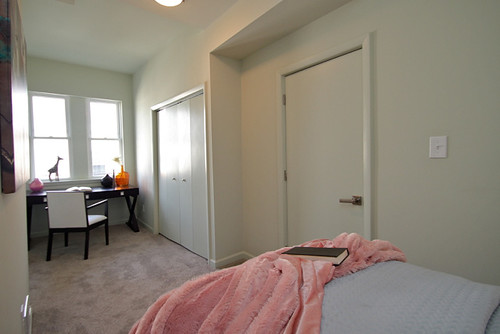
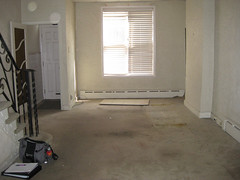
- Before. The first bedroom was narrow but long enough to fit a bed and a desk. Unfortunately, it also boasted some grim faux paneling, drop ceiling, and a prime 1970s rug:
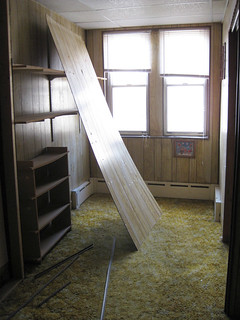

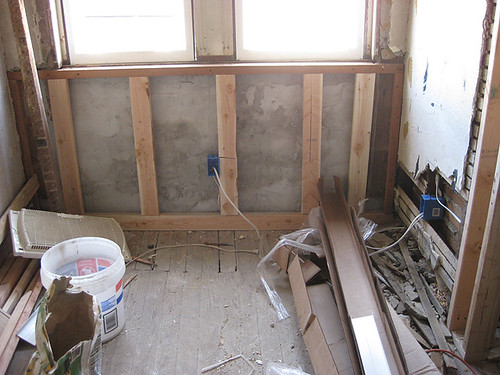
- During. All that panelling came off, revealing a variegated set of walls underneath.
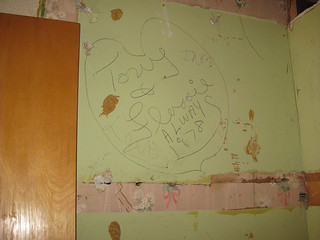
A little souvenir from the previous owners,
who must have put up the panelling themselves.
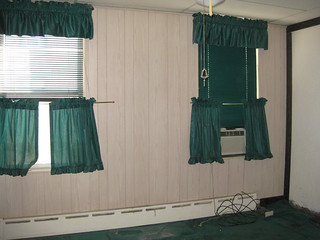
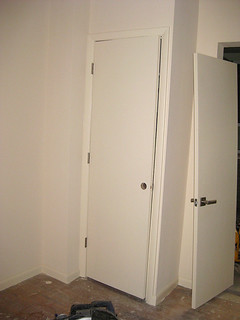
There was even a walled-in minicloset in the front bedroom!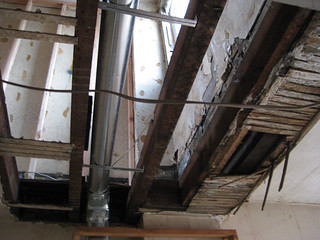
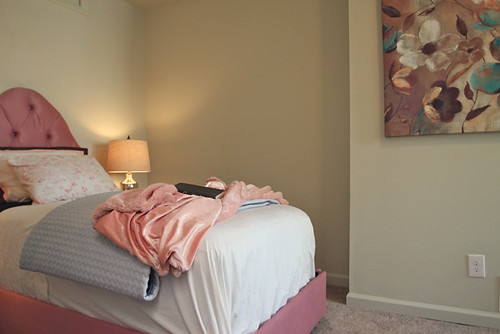
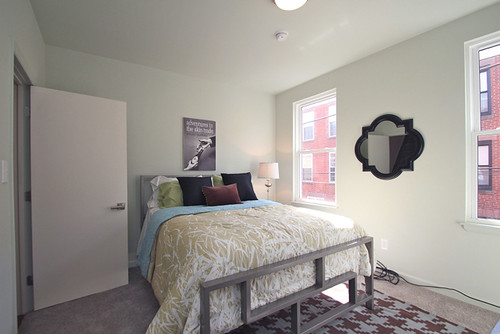
- After. Ok, new drywall and paint, some carpet as mentioned previously, and a little more rational treatment of those closets, and what do you get? Here's the first bedroom:
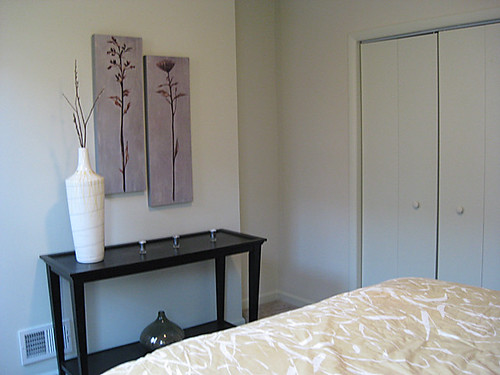
Wednesday, November 18, 2015
Tales of the second floor, Part I: The bedrooms
We previously heard the sad tale of the floors in these two rooms. But everything else about their transformation was all happiness and joy! Let's take a look:
Thursday, October 22, 2015
The living room and dining room story.
It's been a while since we talked about these spaces, other than the floors, so let's look back:
Before, was ugly carpet and a vestibule that stole living space.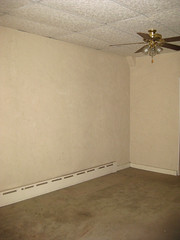
Popcorn ceiling and a sad fan completed the space.
Then the space was mostly a storage space for debris, or bits of cabinetry waiting for their final destination. The framing around the chimney got opened up, but only to insert some ductwork for the upper levels.
A big set of ducts and pipes (for the new 3rd floor bath) were run up in the diningroom corner. Which made it seem more reasonable to add a coat closet, trading a little table size for some handy functionality (sadly rare in Philadelphia homes) and helping to minimize the jarring soffit. [I think the extra door leaning there was headed for the basement stairs.]
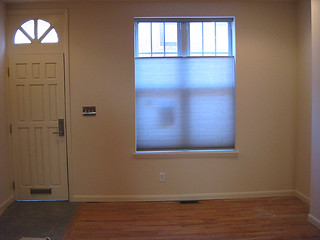
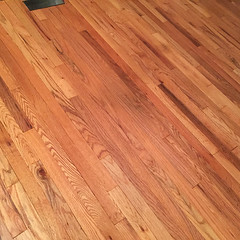
Then, we started rebuilding -- you've seen the wood, but we added some tile for the new entry:

New door, stylish blind, a snazzy little welcoming light switch plate...
A modern flushmount light in the dining area...
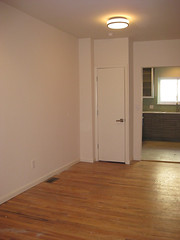
(Note that I also went with all modern lever knobs in this house)
And we're ready for staging! Here's the final reveal:
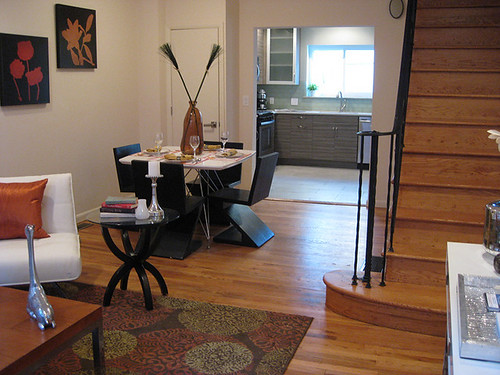
Here's the view from the door. yum!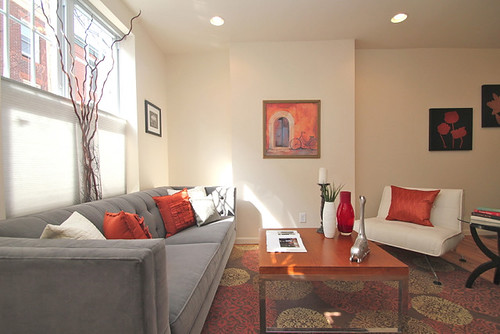
Seating area in the living room.
The view back toward the front of the house.
I think that counts as an overall improvement! (And man, my stagers really bring the place to glorious life!) Wait till I take you upstairs -- next time.
Before, was ugly carpet and a vestibule that stole living space.
Popcorn ceiling and a sad fan completed the space.
(Note that I also went with all modern lever knobs in this house)
Here's the view from the door. yum!
Seating area in the living room.
The view back toward the front of the house.
Tuesday, October 6, 2015
Quick take: A story of floors
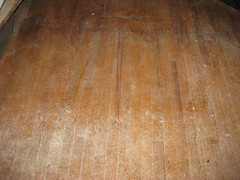
When I look at possible flips, I do a lot of peeking under grim old carpet in hopes of finding good floors. That seemed to be the case here, so I planned to refinish the floor everywhere. However, it didn't play out quite as imagined, but in three different ways:
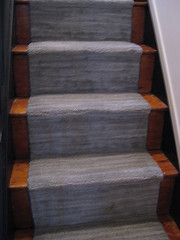
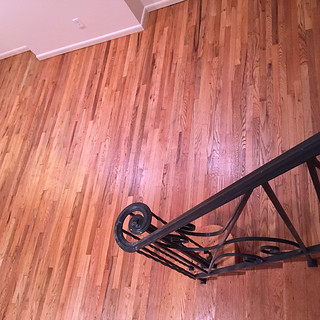
And finally, when the steep stairs from the second floor to the third were too damaged on the risers for a good refinish, I avoided carpet by putting in a runner to hide the damage and add some modern pizzaz:
So that's it for flooring! Should be able to continue the room-by-room saga in my next installment.
- The first floor
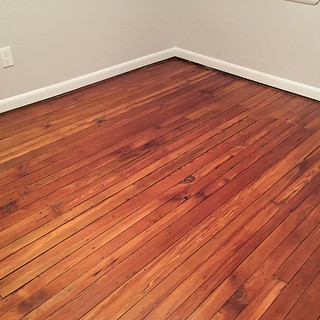
- The first floor had modern wood flooring, which appeared to be in good shape.
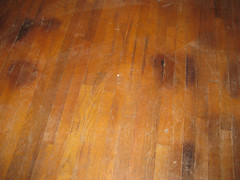
 However, as seen during our demo phase, you're always seeing it pretty dusty, so it can be hard to envision just how it's going to turn out. I had to wait a long time to even get a good look at the floor, free of carpentry equipment and other obstacles. The story then was a bit mixed: it looked good overall, but had some distinct spots in the dining room area taht couldn't be ignored.
- Upstairs, the lesser bedrooms
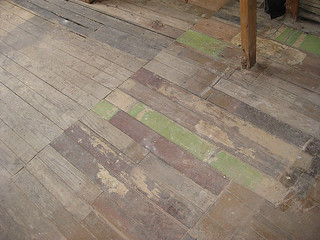
- In the end, neither of the 2nd floor bedroom floors could be refinished. In the rear bedroom, part of the length was an addition, which meant that the floor was composed of a nonmatching patchwork of wood that would never make a unified floor. I suspect that there were different woods as well as different widths involved.
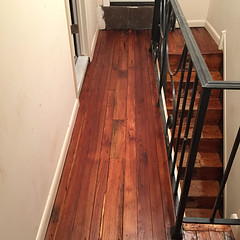
- Hallways and master bedroom
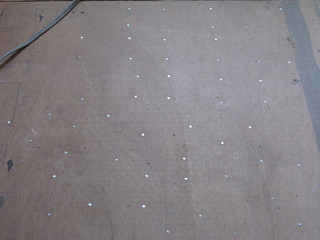
- The contractors weren't too encouraging about the remaining floors -- they were reasonably intact, but were also just subfloor, and as a result couldn't be expected to look anything like finished surface flooring. But they seemed solid to me and had some character, so I got them to do a little patching and then finish it all. Here are some Before shots:
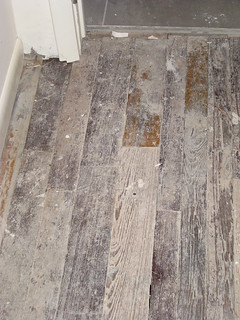
The hallway right outside the bathroom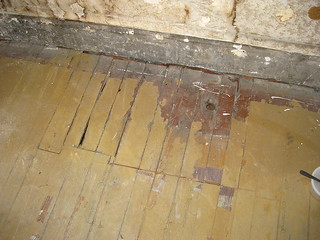
Master bedroom, one of several "hatch" cuts that needed patching.
(we stole floor from other rooms for that) Floor painted here.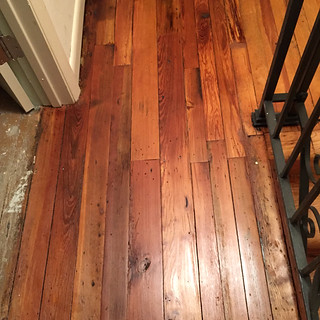
Sunday, October 4, 2015
A kitchen story: Part II
Ok, here's the reveal! Some of these are pictures I took, and some were fisheye shots by my realtor's favorite photographer, made for the listing. Some have staging, and some are just before that happened...
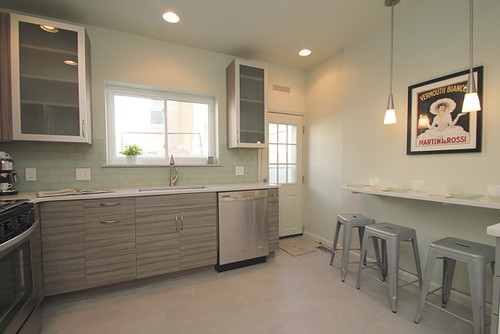
Daylight really brings out the character of this place!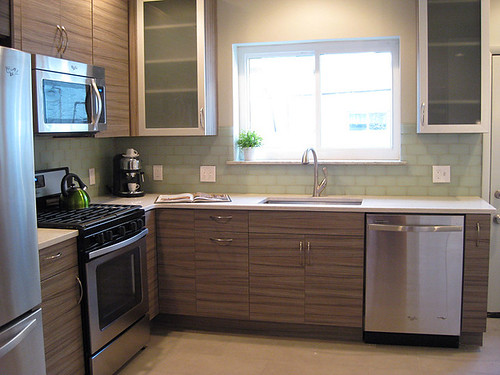
This one gives you a great sense of the left side of the room.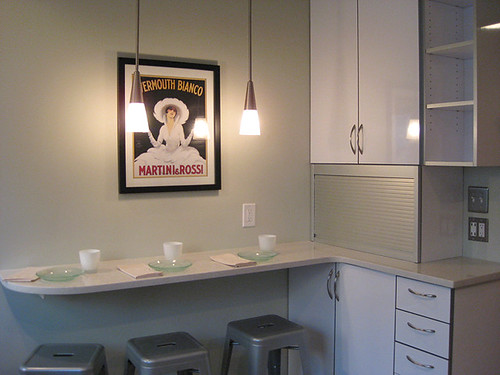
And this one of the right side, previously empty, now fully functional!
A couple of wide-angle shots will help clarify the geometry of all this.
Notice the BlueTooth speaker built in over the door...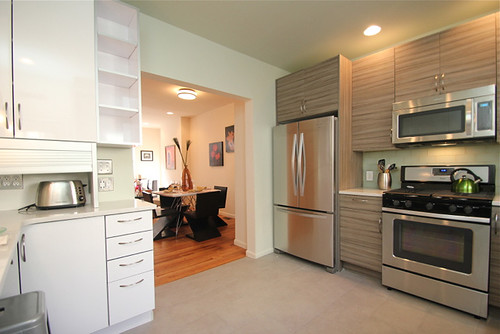
And here we get a little advance spoiler of the finished dining room
and the open appliance garage.
Here are a few additional details and little touches, for those who like a nice design photo.
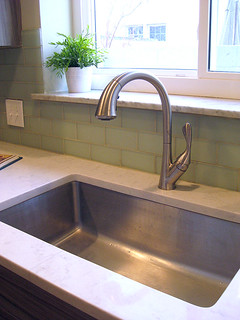
Grey quartz, 30" sink, and my favorite high faucet. Yum.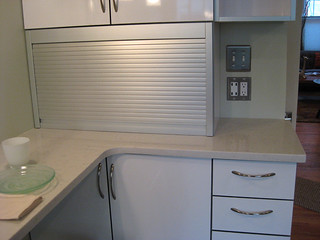
A close-up of the appliance garage so that you can admire the
spiffy charging station (USB outlets!) alongside.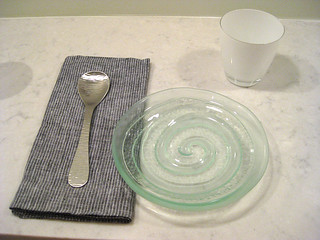
For good or ill, I staged the kitchen myself this time, except for the
painting they threw up there. Love these plates and random napkins...
Well that's it for the kitchen. I guess I should pay off my spoiler above by continuing the first floor. Then I can take us to the upper levels for a trip from demo to staging. Hope to get more up soon!
Daylight really brings out the character of this place!
This one gives you a great sense of the left side of the room.
And this one of the right side, previously empty, now fully functional!
Notice the BlueTooth speaker built in over the door...
And here we get a little advance spoiler of the finished dining room
and the open appliance garage.
Grey quartz, 30" sink, and my favorite high faucet. Yum.
A close-up of the appliance garage so that you can admire the
spiffy charging station (USB outlets!) alongside.
For good or ill, I staged the kitchen myself this time, except for the
painting they threw up there. Love these plates and random napkins...
A kitchen story: Part I
Ok, we've seen the gutted kitchen and some new framing going into it, but what about the fun stuff?!? We want to see the new kitchen come into existence! Apparently I didn't take photos of the floor by itself, but here some some cabinets...
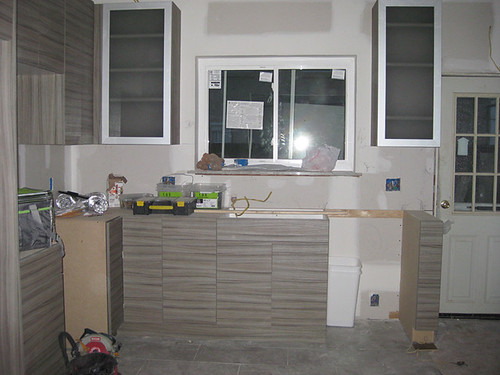
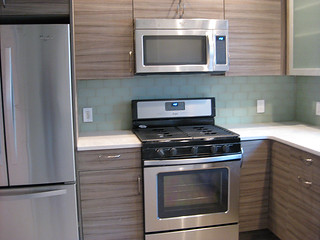
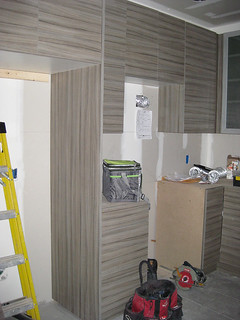 This left and center portion of the kitchen are getting cool gray cabinets with a trendy hyper-wood-grain finish -- the Eurokitchen look that I've been wanting to try (and which is giving this house its name). Man, my guys didn't know what to make of this; this is not the style they're used to. Luckily, they took some ribbing from me pretty well. The photos don't do justice to those aluminum cabinets! wow.
 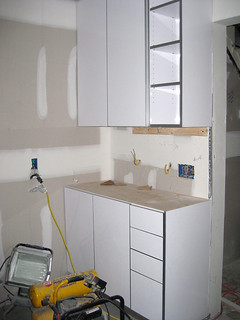 Meanwhile, over on the right side of the kitchen, I'm bringing in some shiny white cabinets. Just to lighten things up a bit, give some variety. It's all the same great line of semicustom cabinets (a new Euro line from Lowes called Latitude), just two different finishes. I think I thought it would give this side a bit of a butler's pantry feel. In addition, to leave room on the side wall for a breakfast bar (and to continue the pantry/hutch feel), we made the base cabinets only 15 inches deep (rather than the usual 24 inches). Still, a nice bank of drawers over there in addition to the cupboards, and the breakfast bar will mean extra counter too.
Here's a look at that breakfast bar. Unlike the last house, this one is basically entirely unsupported -- that is, there are no cabinets at the far end. And thus I was free to make it a bit slimmer than the standard base cabinet, since 15 inches is plenty of leg room to sit at comfortably.
Meanwhile, over on the right side of the kitchen, I'm bringing in some shiny white cabinets. Just to lighten things up a bit, give some variety. It's all the same great line of semicustom cabinets (a new Euro line from Lowes called Latitude), just two different finishes. I think I thought it would give this side a bit of a butler's pantry feel. In addition, to leave room on the side wall for a breakfast bar (and to continue the pantry/hutch feel), we made the base cabinets only 15 inches deep (rather than the usual 24 inches). Still, a nice bank of drawers over there in addition to the cupboards, and the breakfast bar will mean extra counter too.
Here's a look at that breakfast bar. Unlike the last house, this one is basically entirely unsupported -- that is, there are no cabinets at the far end. And thus I was free to make it a bit slimmer than the standard base cabinet, since 15 inches is plenty of leg room to sit at comfortably.
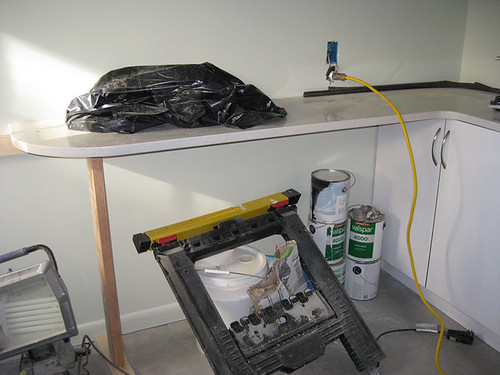
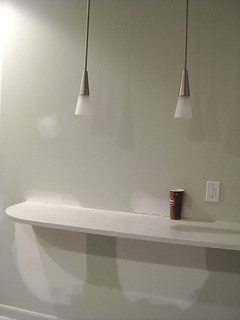
The shallower counter has two benefits here: (1) it allows full access to the cupboard on the right, rather than overhanging the door, and (2) it leaves a little more space in the room (and especially for the door to the patio). While there's a leg in this picture, it was eventually replaced by a pair of concealed brackets that bolt to the stone and then attach to the studs inside the wall where they won't bump anybody's knees. Here's a look after the leg came out and a couple of pendants were hung:
The character of this place really started to change when the backsplash and pulls went in, bringing some green and curves to balance all the cool modern grays and angles.
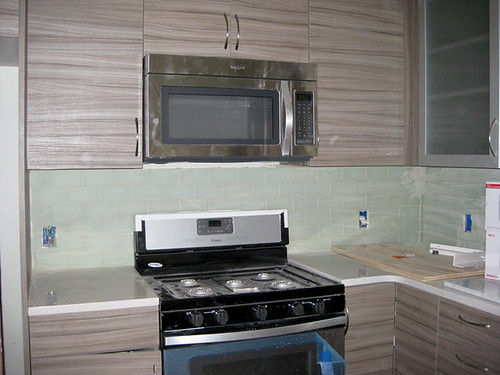
About this time my redneck contractors started to come around and have admiring things to say about the kitchen, which gave me hope that I wasn't taking this style risk into a place where no buyer would follow!
Next post: more luscious photos of this room than you could possibly want!
This left and center portion of the kitchen are getting cool gray cabinets with a trendy hyper-wood-grain finish -- the Eurokitchen look that I've been wanting to try (and which is giving this house its name). Man, my guys didn't know what to make of this; this is not the style they're used to. Luckily, they took some ribbing from me pretty well. The photos don't do justice to those aluminum cabinets! wow. Meanwhile, over on the right side of the kitchen, I'm bringing in some shiny white cabinets. Just to lighten things up a bit, give some variety. It's all the same great line of semicustom cabinets (a new Euro line from Lowes called Latitude), just two different finishes. I think I thought it would give this side a bit of a butler's pantry feel. In addition, to leave room on the side wall for a breakfast bar (and to continue the pantry/hutch feel), we made the base cabinets only 15 inches deep (rather than the usual 24 inches). Still, a nice bank of drawers over there in addition to the cupboards, and the breakfast bar will mean extra counter too.
Here's a look at that breakfast bar. Unlike the last house, this one is basically entirely unsupported -- that is, there are no cabinets at the far end. And thus I was free to make it a bit slimmer than the standard base cabinet, since 15 inches is plenty of leg room to sit at comfortably.
A tale of rebuilding
Ok, I've managed to let a whole year go by without updating anything since the start of demo. In part that's because this project dragged on so long that I lost heart, and then the flurry of life sort of buried it. But I finally got all the photos processed and uploaded, and I want to fill in some of the blanks. However, since I'm not doing this in any semblance of real time, I'm not going to do it by bulk chronology. Instead, I think I'll take one room at a time and show how it developed, what the issues were, and how it came out. This is sort of a fun way to tell the story anyway, so I hope it will make for fun reading. Will see what approach I prefer for the next house in the pipe.
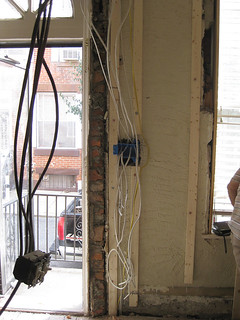
But first a little multi-room story about unexpected structural work. When last we saw the house, all the appliances and wall coverings had been stripped out, but we had yet to progress from there. The kitchen became the starting point for a major structural project: the rear wall had essentially failed over the last decade(s), and the entire shed (the addition comprising the kitchen, 2nd floor bathroom, and 3rd floor roof deck) was showing the effects.
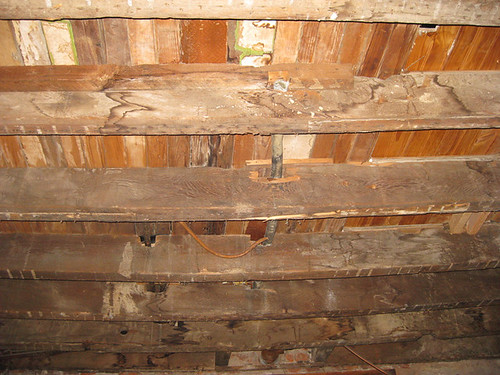
Specifically, the joists were bowed, as you can see in the photo of the kitchen ceiling above. There had been water damage down that wall from top to bottom, and the wood was doing its best but needed help.
So once we had the place gutted, everything came to a halt while we rebuilt the framing from the basement up. That means all new studs supporting all new joists, "sistered" (bolted) to the existing ones to be sure everything above that was sturdy.
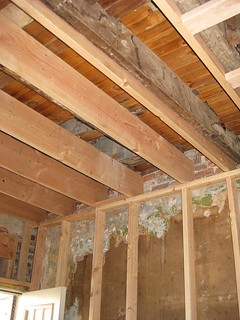
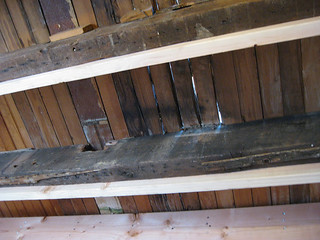
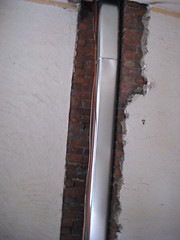
On the floor above, in the bathroom, was where a lot of the damage was visible (see the Story of the Bathroom, to follow) once we took the shower stall out. So, continuing the kitchen work, we put new studs along the side walls but also reinforced the masonry from the outside with new stucco and from the inside with strips of wood bolted to the bricks and running in a grid across the wall. 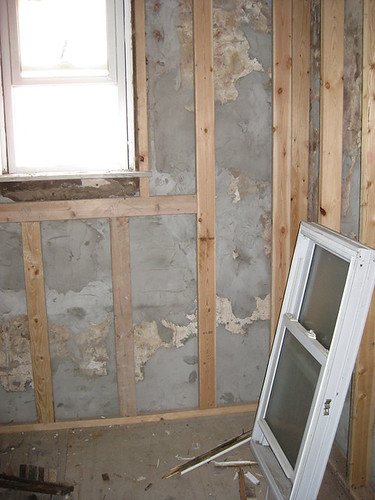
The work continued across into the rear bedroom, just for safety sake. Want to be sure this place is solid enough for the next few generations to be raised there!
These photos capture only a fraction of the work done to reinforce all the walls of this part of the house, but they give a sense. This was a lot of unplanned expense, but often the most important decisions a rehabber makes are the ones the buyers will never see. No point in putting beautiful finishes into a house that's falling apart!
Subscribe to:
Posts (Atom)