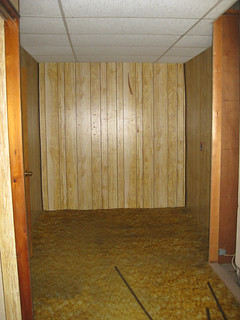
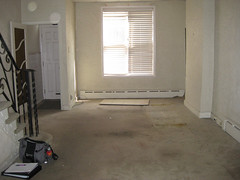
- Before. The first bedroom was narrow but long enough to fit a bed and a desk. Unfortunately, it also boasted some grim faux paneling, drop ceiling, and a prime 1970s rug:
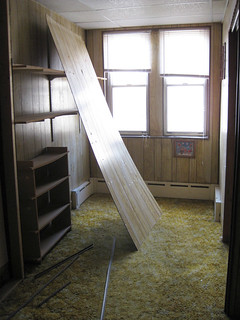

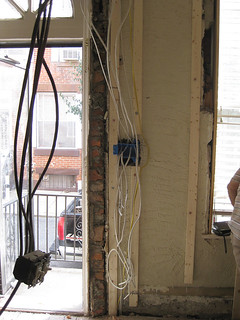
- During. All that panelling came off, revealing a variegated set of walls underneath.
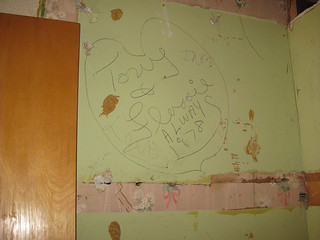
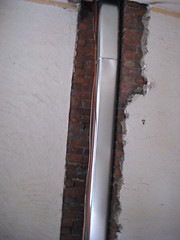
A little souvenir from the previous owners,
who must have put up the panelling themselves.
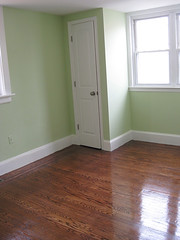
There was even a walled-in minicloset in the front bedroom!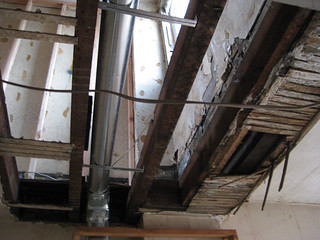
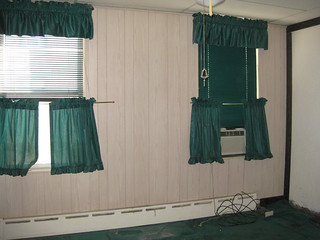
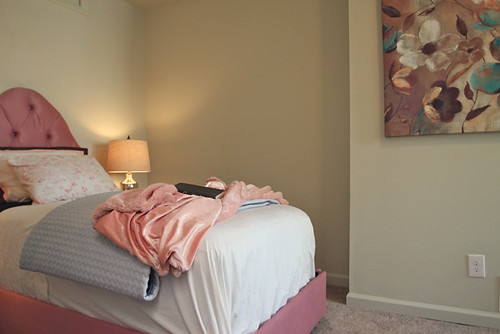
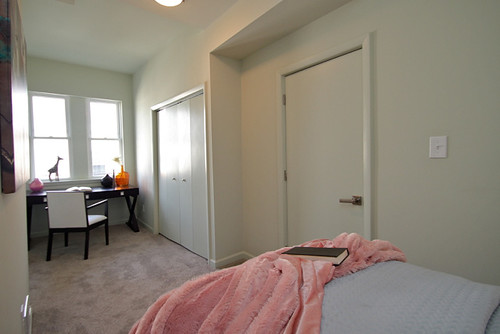
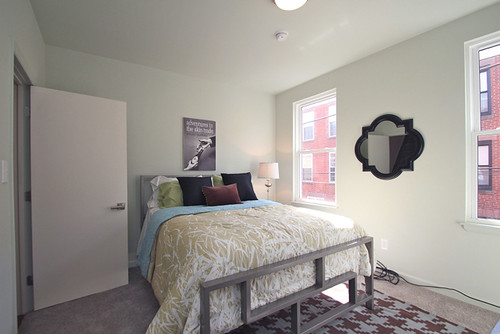
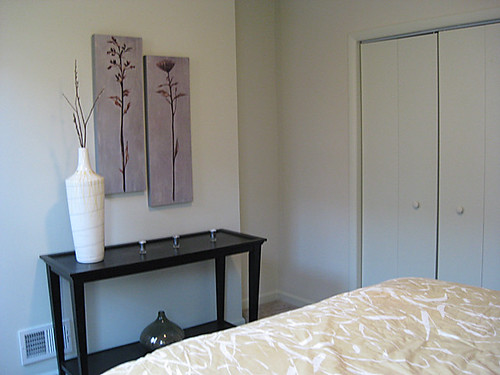
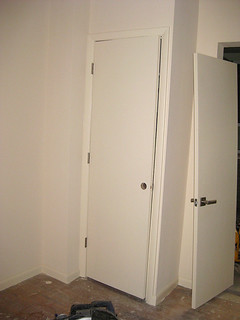
- After. Ok, new drywall and paint, some carpet as mentioned previously, and a little more rational treatment of those closets, and what do you get? Here's the first bedroom:
Showing posts with label after. Show all posts
Showing posts with label after. Show all posts
Wednesday, November 18, 2015
Tales of the second floor, Part I: The bedrooms
We previously heard the sad tale of the floors in these two rooms. But everything else about their transformation was all happiness and joy! Let's take a look:
Thursday, October 22, 2015
The living room and dining room story.
It's been a while since we talked about these spaces, other than the floors, so let's look back:
Before, was ugly carpet and a vestibule that stole living space.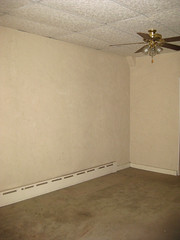
Popcorn ceiling and a sad fan completed the space.
Then the space was mostly a storage space for debris, or bits of cabinetry waiting for their final destination. The framing around the chimney got opened up, but only to insert some ductwork for the upper levels.
A big set of ducts and pipes (for the new 3rd floor bath) were run up in the diningroom corner. Which made it seem more reasonable to add a coat closet, trading a little table size for some handy functionality (sadly rare in Philadelphia homes) and helping to minimize the jarring soffit. [I think the extra door leaning there was headed for the basement stairs.]
Then, we started rebuilding -- you've seen the wood, but we added some tile for the new entry:

New door, stylish blind, a snazzy little welcoming light switch plate...
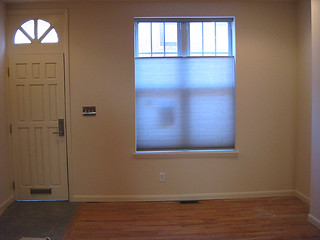
A modern flushmount light in the dining area...
(Note that I also went with all modern lever knobs in this house)
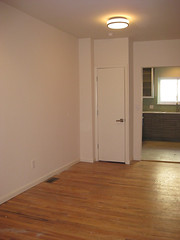
And we're ready for staging! Here's the final reveal:
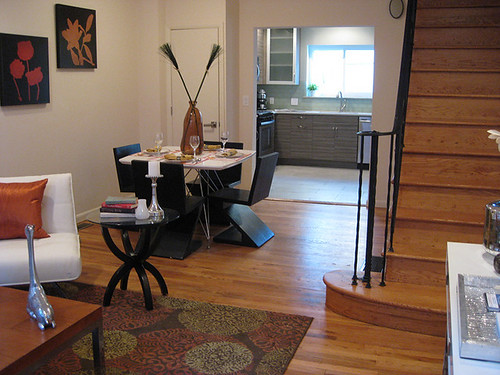
Here's the view from the door. yum!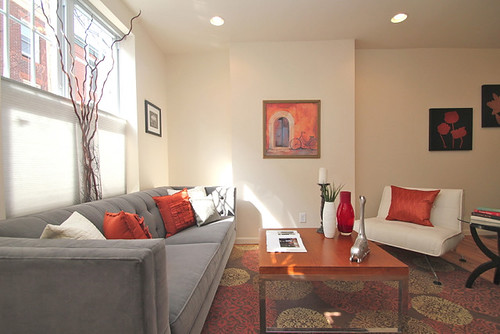
Seating area in the living room.
The view back toward the front of the house.
I think that counts as an overall improvement! (And man, my stagers really bring the place to glorious life!) Wait till I take you upstairs -- next time.
Before, was ugly carpet and a vestibule that stole living space.
Popcorn ceiling and a sad fan completed the space.
(Note that I also went with all modern lever knobs in this house)
Here's the view from the door. yum!
Seating area in the living room.
The view back toward the front of the house.
Tuesday, October 6, 2015
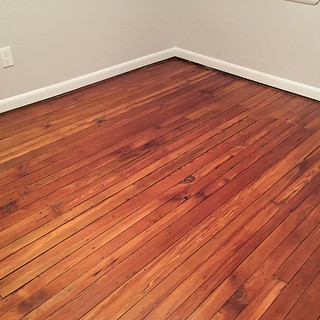
Quick take: A story of floors
When I look at possible flips, I do a lot of peeking under grim old carpet in hopes of finding good floors. That seemed to be the case here, so I planned to refinish the floor everywhere. However, it didn't play out quite as imagined, but in three different ways:
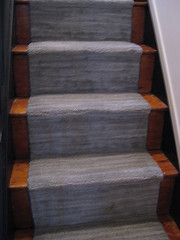
And finally, when the steep stairs from the second floor to the third were too damaged on the risers for a good refinish, I avoided carpet by putting in a runner to hide the damage and add some modern pizzaz:
So that's it for flooring! Should be able to continue the room-by-room saga in my next installment.
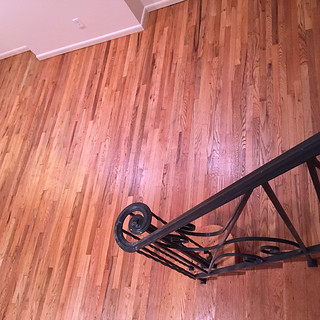
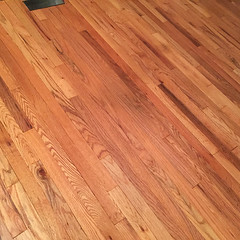
- The first floor
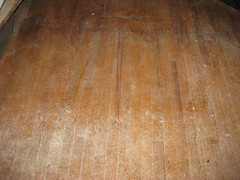
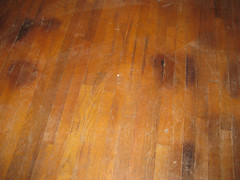
- The first floor had modern wood flooring, which appeared to be in good shape.
 However, as seen during our demo phase, you're always seeing it pretty dusty, so it can be hard to envision just how it's going to turn out. I had to wait a long time to even get a good look at the floor, free of carpentry equipment and other obstacles. The story then was a bit mixed: it looked good overall, but had some distinct spots in the dining room area taht couldn't be ignored.
- Upstairs, the lesser bedrooms
- In the end, neither of the 2nd floor bedroom floors could be refinished. In the rear bedroom, part of the length was an addition, which meant that the floor was composed of a nonmatching patchwork of wood that would never make a unified floor. I suspect that there were different woods as well as different widths involved.
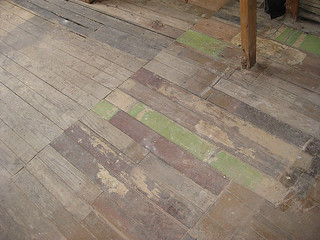
- Hallways and master bedroom
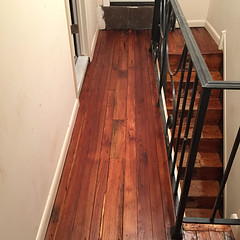
- The contractors weren't too encouraging about the remaining floors -- they were reasonably intact, but were also just subfloor, and as a result couldn't be expected to look anything like finished surface flooring. But they seemed solid to me and had some character, so I got them to do a little patching and then finish it all. Here are some Before shots:
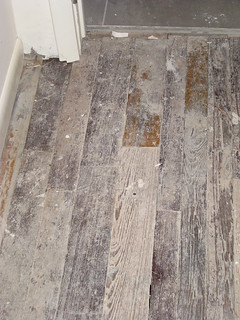
The hallway right outside the bathroom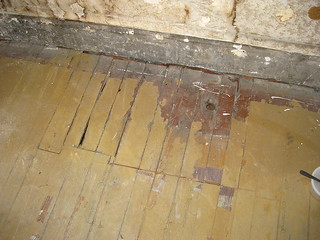
Master bedroom, one of several "hatch" cuts that needed patching.
(we stole floor from other rooms for that) Floor painted here.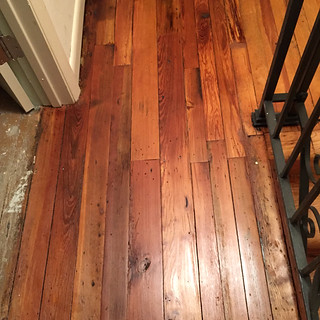
Sunday, October 4, 2015
A kitchen story: Part II
Ok, here's the reveal! Some of these are pictures I took, and some were fisheye shots by my realtor's favorite photographer, made for the listing. Some have staging, and some are just before that happened...
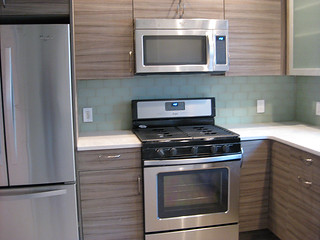
Daylight really brings out the character of this place!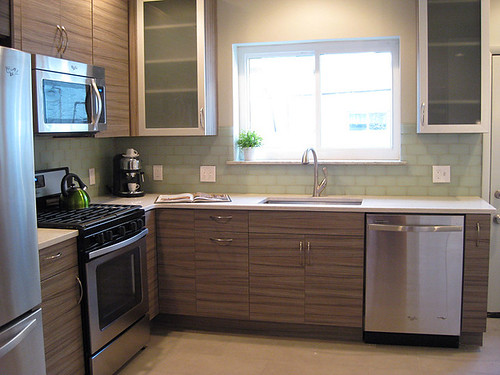
This one gives you a great sense of the left side of the room.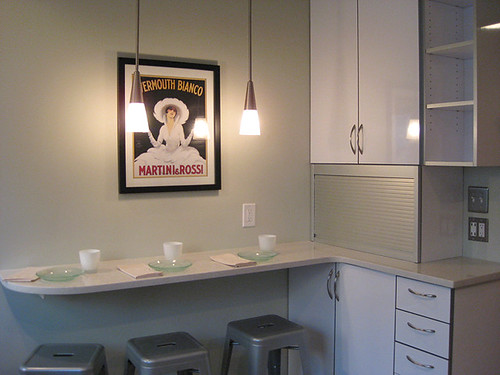
And this one of the right side, previously empty, now fully functional!
A couple of wide-angle shots will help clarify the geometry of all this.
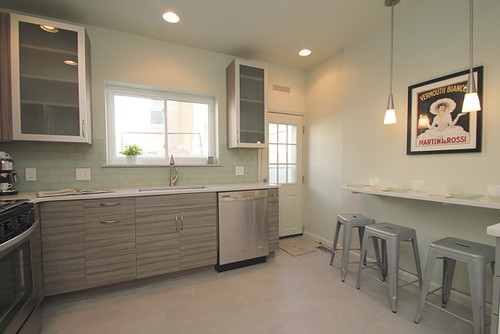
Notice the BlueTooth speaker built in over the door...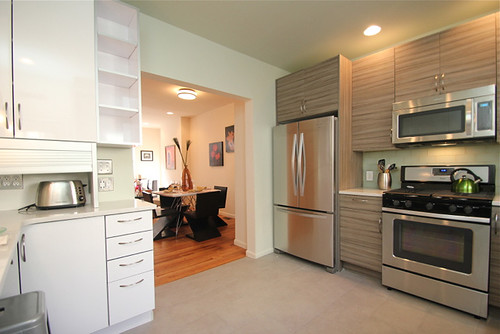
And here we get a little advance spoiler of the finished dining room
and the open appliance garage.
Here are a few additional details and little touches, for those who like a nice design photo.
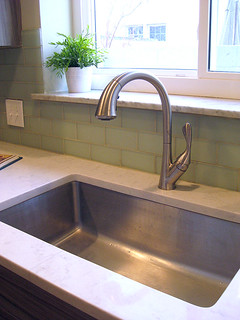
Grey quartz, 30" sink, and my favorite high faucet. Yum.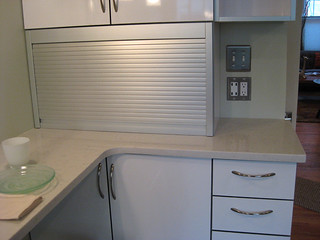
A close-up of the appliance garage so that you can admire the
spiffy charging station (USB outlets!) alongside.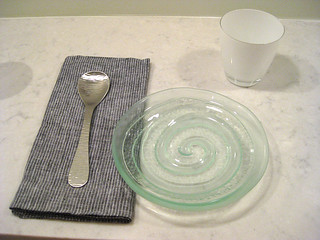
For good or ill, I staged the kitchen myself this time, except for the
painting they threw up there. Love these plates and random napkins...
Well that's it for the kitchen. I guess I should pay off my spoiler above by continuing the first floor. Then I can take us to the upper levels for a trip from demo to staging. Hope to get more up soon!
Daylight really brings out the character of this place!
This one gives you a great sense of the left side of the room.
And this one of the right side, previously empty, now fully functional!
Notice the BlueTooth speaker built in over the door...
And here we get a little advance spoiler of the finished dining room
and the open appliance garage.
Grey quartz, 30" sink, and my favorite high faucet. Yum.
A close-up of the appliance garage so that you can admire the
spiffy charging station (USB outlets!) alongside.
For good or ill, I staged the kitchen myself this time, except for the
painting they threw up there. Love these plates and random napkins...
Friday, June 6, 2014
Unveiling of the floors (and closets)
Ok, the paper finally came up. The floors look pretty gorgeous, although my contractor did make everything a much darker shade than I had anticipated or wanted (to hide some ancient dog pee or something) -- luckily he made the downstairs lighter, so the inlays all around the edge of the room show up better there. Anyway, I realized I'd never shown how all these new closets and general paint/trim was looking, so these "empty room" photos are covering all of that ground too.
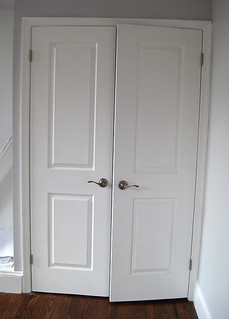
Here's the master bedroom, in a lovely shade of light grey, with shiny floors in all their glory. The bookcase in this room wasn't done until literally after the staging furniture was already installed, but you can at least see the look of the closet (from the outside), with french doors and graceful handles. This room has really turned out as all I envisioned.
Here's the other main bedroom, in lovely prairie grass green, with its matched pair of closets.
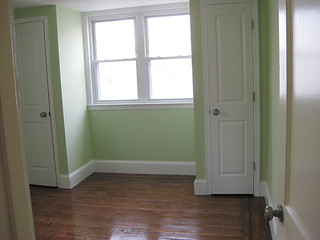
If you blow up this second shot, you can see that the inlay around the edges of the room still shows, despite the dark stain -- hooray for retaining some history!
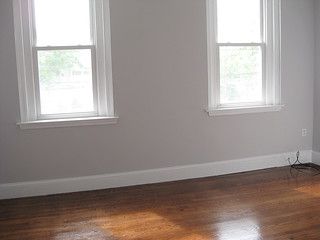
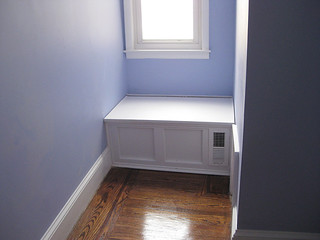
It's hard to take a good picture of the middle bedroom, since the closet is just inside the door and there's not that much else to show (blue paint and white trim). So I'll beg your indulgence for another window seat picture, just to get the window and floor in there too.
I guess that means that all that's left is to unveil the staged listing photos, and then I'll finish up with some power before-and-after comparisons. But I'm taking a little vacation first, so you'll just have to wait!
Thursday, June 5, 2014
Progress on other fronts
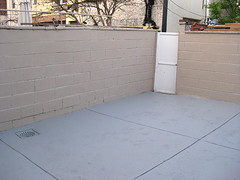
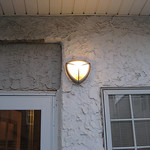
Lest you think that we're working only on the kitchen, there have been a bunch of developments in other parts of the house, some final facelift steps, recently too. For example, the patio has had a fresh coat of sanded external paint (below left), colors tying in with the interior color scheme and cleaning up a host of peeling and cracked sections. Also, we replaced a sort of goosenecked-lamp rear patio light with this funky modern fixture (at right).
Around the same time, the bsement finally got its carpet -- a sort of berber-style nap, over a moisture-proofing layer and subfloor padding. It looks and feels great, exactly as I hoped!
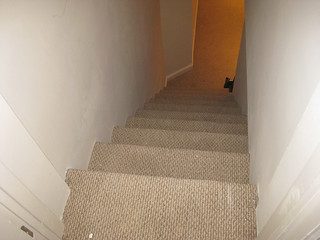
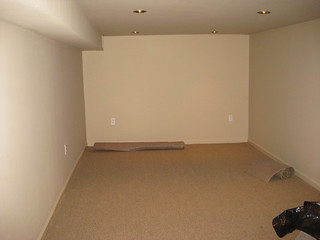

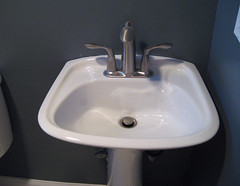
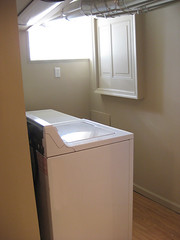 So now the stairs and family room (and extra space/office) are carpeted. There's glass brick in the bathroom and laundry areas, letting natural light down in there, and the bathroom is sporting a masculine grey color scheme and a cute new pedestal sink.
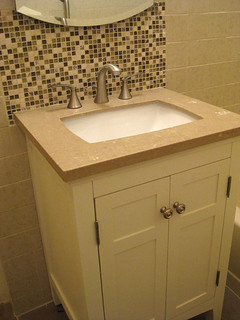
Meanwhile, most of the big stuff is finished upstairs too. The new vanity, backsplash, and medicine cabinet make a pretty sharp combination.
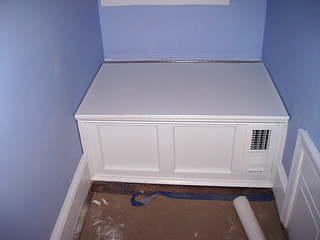
The window seat has gone from a group of boards to a cozy little perch (just waiting for the room to be clean enough to unwrap its custom cushion).
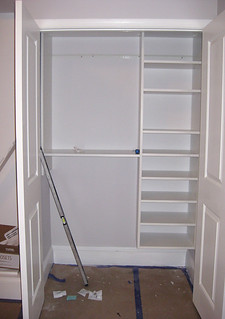
And the nice master closet, with its french doors, now has a nice set of hardware to add to its appeal (including a double rod and a bunch of shoe shelves).
Next up, a glimpse of the uncovered floors and finished bedrooms just before they get staged for showing.
 So now the stairs and family room (and extra space/office) are carpeted. There's glass brick in the bathroom and laundry areas, letting natural light down in there, and the bathroom is sporting a masculine grey color scheme and a cute new pedestal sink.
Subscribe to:
Posts (Atom)