1: Kitchen
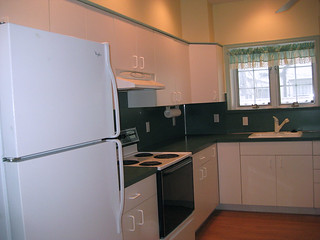
Ok, here's the original kitchen. It's a bit dated (hello, emerald green!), but in pretty good shape, so I went through a phase of hoping that I could just put new doors on the cabinets and keep them (as well as replacing the countertop and appliances, of course). However, there were just too many things to work around -- we'd have to replace at least one cabinet on the window wall to put in a dishwasher, which the kitchen didn't have, while trying to match the end piece to anything else that showed, and then I was planning to put in some additional kitchen elements (see below), which would probably have to be a different but coordinating color, and then there's all that soffit above, just crying out for additional storage space, and the cabinets came in some unusual sizes, which meant custom replacement doors... and eventually I decided I'd be better off just pulling everything out and starting from scratch. Which of course meant a little money angst, but I've gotten over that and gotten excited about the planning phase. On the up side, all the cabinets came out cleanly and went to Habitat for sale at their Restore supply store, so I feel good that the decent cabinets will have an ongoing life.
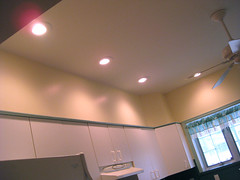
Ok, on the up side, there's already good task lighting in this room, so I won't have to put in a lot of (read: any) cans. I will be taking out that ceiling fan, as it's broken down as well as a little old-fashioned for my taste, and putting in a new overhead fixture (which I'm kind of in love with). Also, while we're looking up, see all that soffit? It's going to fit 42-inch cabinets and probably leave enough space for somebody's ceramic chicken collection too! Anyway, will be keeping with the white cabinet theme, as my imagination had already run pretty far down that road (including getting attached to a particular granite) by the time I made the decision about the cabinets.
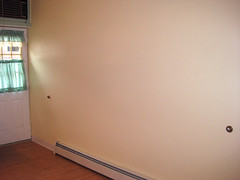
The third wall of the kitchen is currently occupied by nothing. That is, the previous residents had a table and chairs crowded in here, but there's a dining room space right outside the kitchen, so I think that's not the best use of space. However, doing anything built in is basically constrained by that floorboard radiator; luckily, I'll be taking that out as part of a project to convert to forced-air heat and central air-conditioning, so now I have the option to put some additional kitchen over there and jazz things up a bit. In fact, between those two bumpers on the wall there are some 7 feet of workable space, so I intend to get in some cabinets and a breakfast bar as well, with spiffy pendant lights. I have a lot of drawings, but I think I might leave that as a fun surprise for the "after" pics...

Also, can I just give a shout out to this white sink/faucet? Have never seen anything like them. They followed the cabinets to Habitat and will be replaced with a really luxurious deep single sink and modern faucet, which I think will be a big plus to the utility and wow value of the place. Bye bye, white-out!
2: Bedrooms
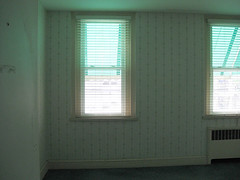
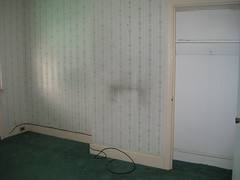 This is the master bedroom.
See the lovely green dusk provided by all those awnings? (Begone!!) The room is a decent size and mostly needs a facelift. The second picture here shows where most of the work will happen (is happening! yay!): it has only a shallow closet (a foot, too little for a hanger bar, so it's mostly just a couple of hooks for your, um, scarves), a not uncommon problem in the older houses in this area. Next to the closet is the framing for a chimney running up from below. (This room has a closet outside the door in the hallway that must be where they kept all their actual clothes.) We're going to deepen that little wisp into a real closet, and match it with a built-in bookcase in front of the chimney, which I think will class the place up, while still leaving plenty of room for a dresser, TV, whatever over on the left. And get rid of the rug -- did I mention that? We're hoping that there are decent wood floors under all this carpeting, but I didn't know in advance what I would find for sure, so some possibility of new flooring everywhere...
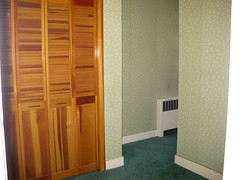
This is the middle bedroom, whose plight is the source of the house's nickname. At some point somebody built a big closet on one wall, presumably because the elderly resident wanted storage more than additional bedrooms. In addition to reducing the room to an unusable footprint, this closet and some prior expansion of the bathroom next door resulted in the little tunnel that appears on the right there. At the narrowest it's about 18 inches, and it opens into a 3x5-foot "hallway" to the room's window!!

Also the radiator. Anyway, this room could barely fit a desk, and you're obviously not using that space down that tunnel (which is probably why they also overlooked some water damage around the window for some time). This is not a room that the average new homebuyer would consider real space, and honestly, it's just kind of embarrassing. But I immediately reimagined it with that closet torn out and a cozy window seat built under the window to turn a vestigial bit of space into a usable kid's room with some real appeal. Can't wait to see its transformation! (There's a drop ceiling in here that's headed out too.)
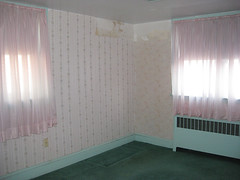
The third bedroom is pretty ok. Also good-sized, needs a facelift, but its main problem is a complete lack of closet. That's pretty easily remedied, and my contractor suggested an arrangement that might actually add a little charm too, so yay on that front.
Well, I think I'll stop here, and get to the main bathroom and the extensive basement plans next time. Demo already mostly done, so I've got all kinds of chaos pictures to share too. All of these bedrooms will be getting their overhead lights replaced with modern fixtures, as will the hallway -- despite the brass railing, I'm going with brushed nickel for everything from bathroom faucets to hallway door handles, so there will be a *lot* of hardware in my future! woot!
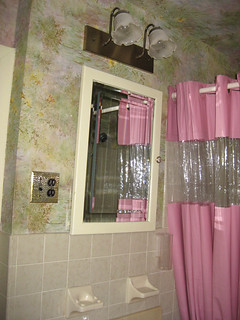 Thought I'd work in a quick post for the bathroom, since I've got the itch to get to demo. As you can see, this is a bit of Victorian glory, from the floral lights (matched in an overhead fixture) to the Monet wallpaper that covers every surface. However, all that excess disguises the fact that the tile on the walls here is actually pretty decent -- a sort of variegated khaki, and matched by an inoffensive biscuit-colored tub. So I decided to try to get back some of the additional kitchen cost by saving a few pennies here, and we'll keep this tile and just update the look with other elements. This means keeping the built-in towel bar and toilet paper accesories too; however, those cup and toothbrush holders just scream 1970 (Edit: 1950?) to me, so they have to go, and we'll put a nice glass mosaic tile backsplash there above the new vanity to bring some color and pull us into the current century. (Also unlikely to see in the "after" photos anything like that brass outlet plate or any of the other rather baroque switch plates that fill this place!)
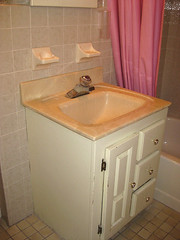 Ok, here's the current vanity, which is just beat up and old. Will replace it with something that maintains a bunch of storage while adding a modern widespread faucet set and a stone or composite top -- am rather smitten with an inexpensive option from Lowes (after looking at a million pricier ones) that actually works with all the biscuit, a color that is not part of my usual mental repertoire. The new medicine cabinet/mirror will also add more storage, which seems important when you have a three-bedroom house sharing one upstairs bathroom that can't fit anything larger than a 24-inch vanity. There's also a narrow closet in the bathroom, which will help with linens and other stuff, but I'm big on More Storage Is Always Better in tight city townhouse life!
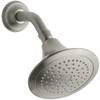
Finally, here's the shower. Because there's a tub, we won't be doing any fancy glass enclosures or the like, but we can get a lot out of regrouting the tile and updating the hardware to something hyper-modern, probably something in the rain shower head family like the one at right.
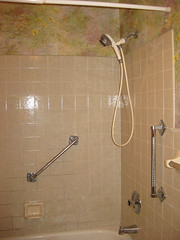
 Probably a new curtain rod, or I'll just remove it for showing unless the staging folks think they have just the curtain for the job. The main thing I'm still pondering is the grab bars -- I'm all for having one, but two is a bit overkill, and they're (a) chrome, making me want to replace them, but also (b) screwed through the tile, which means it could be hard or impossible. I think I'll be bringing a few candidate replacements home to see how well they could cover the existing holes, before making the final decision. If I had to do a band of accent tile all the way around to make up for removing them, I think I'd have lost all the proposed savings for this part of the project...
I think that's it for the bathroom. The toilet is fine, and will be kept. The floor tile is hokey and will be replaced, but after going in and out with a dozen tile samples, I have yet to settle on the right one -- I just can't get my head around the color of the wall tile, and I need to harmonize with it without being too close in color, so many promising candidates have fallen by the wayside. I may have to switch my notion from tan to grey, but still have another round of trials before I pull the trigger -- have decided not to let this hold me up from ordering all the other parts for the project, though, as some things will need to get moving soon...


